Little Missouri Fly Fishing
Custom Fly Rods
by Jeff Guerin
There's nothing quite like having a rod "with your name on it"! But there's a lot more to a custom rod than just a bit of personalization.
I first started making rods for other people way back in 1989, it's what got me into the "business" of fly fishing to begin with. What started out as just a natural progression through the world of fly fishing (fly fishing, fly tying, rod building...) became Clearwaters Rod & Fly Shop in Shreveport and ultimately brought me to guiding. The number of rods I've built or restored now stands at about 300.
Many of you who have fished with me have used rods that I've built. For those who have I hope you enjoyed doing so.
 The components of a rod consist of the "blank", the reel seat, the handle and the guides. I have become particularly pleased with the St. Croix company's new Ultra and Avid rod blanks. They are great rods for the price, hard to beat, with really nice actions. Of course there are scads of rods on the market now, and most of those blanks are available to build finished rods on. It comes down to what you want to spend and the "feel" you're looking for.
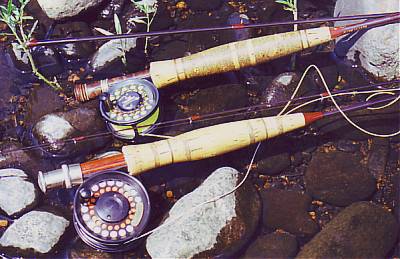
I've also used a lot of the Pacific Bay reel seats that you see here. They are very nice looking and work well. Again, this is just one option. You will see another on my personal rod at the top of the page. That's an all wood Bellinger seat, one of my favorites, but they're not cheap.
 Usually, the first thing everyone notices about my rods are the handles. They are more comfortable, larger and longer which makes them easier to handle for a day's worth of casting. This may be the most critical part of the rod building process. I still do them completely by hand, cork ring by ring. I try to gather the best cork rings that I can as well as add some nice variation like my rod (again at the top of the page) with burl or burnt cork if you're interested. Very distinguishing, but again, not cheap. Or we can have just a simple cork handle. I can also shape them into any number of styles, my favorite for lighter rods being a western style.
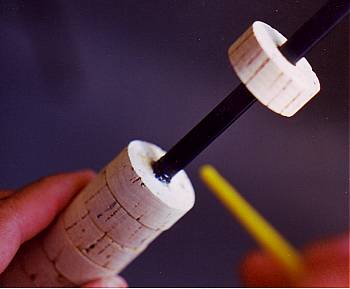 Each ring is filed out to fit its spot on the blank and then glued to the blank as well as to each ring next to it. I use two ton epoxy for the handles rather than a urethane. Have you ever had a handle come loose? These don't! The epoxy bonds to anything and the two ton is flexible enough.
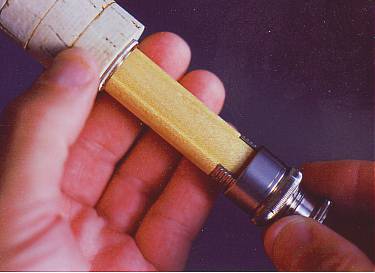
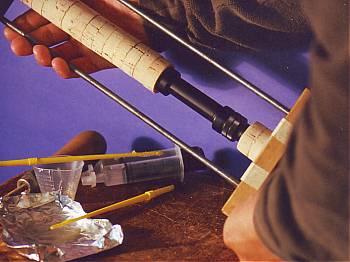 I then clamp the rings tight while the epoxy sets. On this rod you see that I have added a permanent fighting butt right to the blank.
I've never fully understood the concept of a removable fighting butt. I mean, if you're going to be using a rod in a situation that you need a fighting butt, then by golly have a rod with a fighting butt! I don't want that thing failing in the middle of fighting a big fish. Anyway...
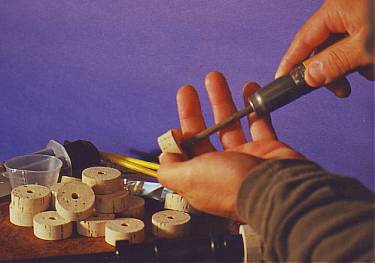
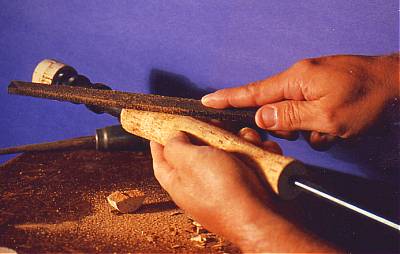 Here's where the serious work comes in. Grinding the handles. This is what scares a lot of neophyte rod builders! After all, this can't be fixed without taking all the cork off and starting over. And I began building rods without using a lathe to spin the handle and continue that practice today. And even though, maybe that takes a little longer, I still like a pace that I can control stroke by stroke. Things can happen too fast when power is involved!
I start grinding with a heavy rasp and progress through a finer file to coarse sandpaper to 200 grain sandpaper, all the while shaping the cork to the desired style. Here you see what is known as a Full Wells grip.
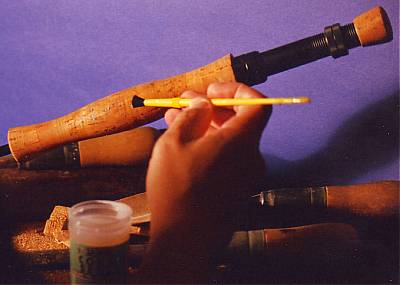 Once I have the finished shape and smooth finish I put a cork sealer on the handles. This is one thing you won't get on a stock rod. The sealer keeps the cork "crispy", clean and tough. It also has a stain-like effect and really brings out the beauty of the cork.
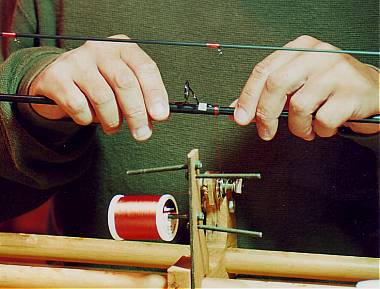 The next step is spacing and wrapping the guides. One of the great things to come out in recent years are the "single foot" snake guides. The single feet have cut down on the weight that comes with wrapping and finishing, simply, half as many wraps and half as much finishing. The single feet also retain the original action of the rod better.
Here you see me using the original wrapping jig I built in the mid 80's to build my first rod. It does everything I need it to do, still. Of course wrapping a rod is wrapping a rod. Once again, I try to stay away from power.
Guide spacing is done by taping the guides on, running a line through and flexing the rod with the line to see where the support of the guides needs to be distributed. Not by some formula. I also use more guides in some situations than you might find on stock rods.
Wrapping a rod is the one aspect that you can get perfect! If you mess something up, you can always go back and do it again, and again... and again! Until you get it right.
 Once the wrapping's done and cleaned up it's time to put on the finish. I always use Flex Coat High Build finish now. I tried several things over the years but I've found the Flex Coat to be the most consistent and best looking finish. But before that, I put your name, the model, length, line weight, my name and a serial number on the rod. Sometimes, even an enscription if the rod is a present or special.
I really like the translucent effect the Flex Coat has on the thread, it's a "classic" look. Notice how much darker the thread becomes as the finish sets in. Makes thread selection critical. I have gone almost exclusively to this Rust colored thread. It looks great on almost every color rod blank there is.
If you're interested in one of my custom rods get in contact with me jeffonthelittlemo@gmail.com or call me at 870-210-3681 and we can talk about what you need (or just want), the options and what it'll cost. I've kept my prices pretty reasonable all these years, starting in the nature of $275 on up, depending on the components.